KnotWorx
Specs for Braiding
Key Fobs
One of the things that you have to sort out when braiding anything that involves attaching some hardware, is what end to start at, and how do you finish.
A key fob involves hardware that has to be attached somehow and integrated into the fob.
Sometimes you can attach the key ring after the fob is completed.
Other times you have to begin with the key ring (or other hardware) already involved.
If this is the case, I've found it best to start at the ring end and braid from there.
Some of the fobs I make use multiple strands and these usually require starting with the ring attached somehow. I hope to show how this can be done here.
A short video is available to get you started.
You can use different colors or patterns for each strand, or both the same

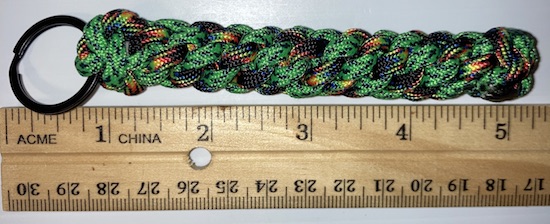
Since this fob is round, each Crown Knot was in the same direction.
The key fobs that are made using a series of Crown Knots have some variations possible. The 'profile' or shape can be either round or square.
This profile is determined by the direction of braiding for each Crown Knot.
If all the knots are made in the same direction (clockwise OR counter-clockwise) the profile will be round.
However if each knot is made in the opposite direction of the previous one, the profile will be square.
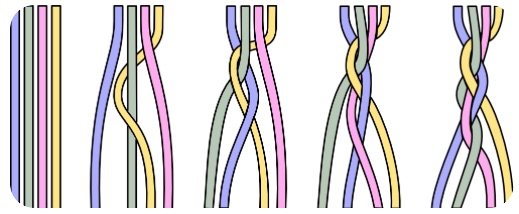
The video linked above shows braiding a Crown Knot in a clockwise direction. Continuing in the same direction would result in a round profile. Alternating each knot creates a square profile.
 |
 |
| This shows the first knot, which is clockwise | The second knot, which is counter-clockwise |
If the braiding were continued as above, the profile of this key fob would be square.
Most of these fobs will take about 5' of paracord each strand (unless otherwise noted). The actual length for a fob about 4" - 4.5" long is about 4', with one foot extra to work with when tightening. That will be trimmed off and secured.
But this one is square ... so alternate directions were used on each knot.


As with all braiding, tightening each knot consistently as it is finished is important. Otherwise the result will be sloppy and loose - not much good as a key fob.
When the braiding is done it's time to trim off the excess paracord. This can be done with sharp scissors or a utility knife. Try to leave as little as possible, but not flush.
After trimming, for the final step in the process, I use an electric soldering gun with a flat end to gently melt the left-over bit of paracord into the rest of the braiding. When done properly it should be smooth and fused tight. If you don't have a soldering gun, a butane burner with adjustable flame should also work.
Tamping the hot, melted end down with a rounded metal tool will smooth it out and make sure it is fused tightly.
Be careful of the melted paracord - it's hot and sticks to your fingers!
Leashes

The braid I use for leashes is a 4-strand round braid. If you use a diferent braid your mileage my vary.
Obviously a dog leash will take more material, so I will try to give you some general numbers.
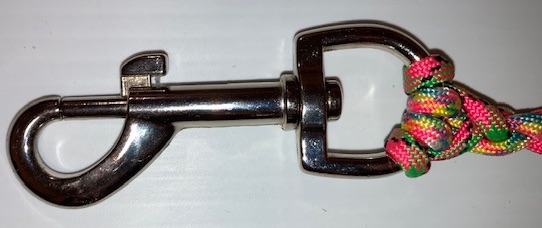
The material I use for leashes is 2 strands folded in half, with the collar clip centered at the middle of both strands. This can be as simple as looping the paracord through the clip and start braiding from there.
An alternative is to use a knot to attach the clip - Cow hitch or Cat's paw

Since a leash is so long, to begin braiding you need to hook the collar clip onto a small hook mounted on something solid. A cup hook mounted on a wall about waist height or something similar. This allows you to use a stool or chair to sit on - doing the leash will take some time.
The reason for starting this way is because of the way the braiding is done. To tighten each over-under pass, you have to pull up with the loose ends to tighten the braid, while keeping tension on the length already done. As the braid gets longer you will have to move further away from the wall.
A 2-foot length of leash takes about 6' of paracord each strand, so roughly a 3:1 ratio.
But don't forget you need a loop for a handle. I make mine big enough to fit winter mitts or gloves.
I incorporate the loop-handle as part of the leash, then back-braid it back into the leash. A bit of work was involved figuring it out, and a fid is useful.

An 8" loop plus back-splicing into the leash (about 4") is about 20" of paracord and takes about 6' of 2 strands. (each strand is folded in half, so you are working with 4 strands about 3' in length.)

This photo shows 12" of 4-strand round braiding. Starting with about 60" of paracord there was about 27" of cord left over.
So this 12" of braiding took about 33" of paracord. Almost 3'.